Showing posts with label Full Sail. Show all posts

Tuesday, May 7, 2013

Design Class

This class had a LOT of art, so I'm not going to bother posting all of it up. Basically we just were given some critical thinking tasks in order to get a better handle on design principles. What makes a composition more interesting and engaging to look at? That kind of thing. 

Oh and the catch: the whole class was entirely traditional art... After I've finally discovered I am most definitely more comfortable with digital art... But I do enjoy a good challenge I suppose.

The final project consisted of an entire chunk of pre-production concept art. We had to choose from a character design project, environmental design project, or a storyboard project. I chose to do a character because I have a lot of fun with that sort of thing.

We were also given a fairy tale to work from, along with a choice of two characters. My fairy tale was "The Twelve Dancing Princesses" by the Grimm Brothers. I won't spoil the story for you, but the characters I did were the Old Soldier and the Youngest Princess. So here is some of the art I had to create to design these characters:


These silhouettes were done first to block out some different shapes and styles and get a feel for what best represents the character you are trying to create.


Next, I chose a few of each that I liked the most and did some rough drafts. This gave me a more clear idea of what they would all look like. Now for the final decision.


Here's where the heavy duty concept art comes into play. Above we've got full character turn arounds, expression sheets, and facial canon changes (to play with different face shapes and styles). Once the character is pretty solid, we get the final concept renders:


And voila! That's a very basic idea of how character design pre-pro works. If anyone out there is looking to design some characters, I have one bit of advice for you: learn how to use construction shapes! They are absolutely the most important tool for drawing characters consistently. I always hated the idea, but now I am obsessed with laying out my characters in construction shapes first, then working on top of that. Even when the characters are as simple as the ones I did above.

But anyways....I'm exhausted. Too much concept art crammed into one week. And now I am bombarded with too much concept art to be crammed into another week (with Mother's Day this weekend on top of that!!) So I am going to go fall into a dreamless oblivion before I get back to work, haha...

Oh right...Final grade for Methods of Design? 97.84!

Zzzzzz.......

Sunday, April 21, 2013

Shading And Lighting

So I had a really hard time with this class. Basically, we learned how to create lights and how lighting works, whether you're lighting for a picture, for a film, or for a game. Lighting is crucial to design and can dramatically enhance the mood of whatever you're working on. I have always had a keen interest in lighting, so the lighting portion of this class was really fun and easy for me.

Shading on the other hand....

Let's just say, it isn't my strong suit. It took me a really, really long time to understand the concepts and to get a hang of the processes. But where there is a will, there is a way. And my hard work really pays off. It really does go to show though that you seriously have to be willing to put in the time in order to get any sort of pay off at all. I worked my butt of in this class and was only moderately satisfied with the outcomes on all of my projects in comparison to projects in prior classes.

I do commend a lot of my classmates who did excellent work in this class!

But let's cut to the chase. :)

So I'm not going to post a lot of the beginning projects just because I don't want to break any Full Sail rules by uploading their render references. But basically for the first few weeks they would provide a reference image of the render that we were supposed to recreate and some help on how to accomplish this. So for week one, we were learning basic rendering and lighting. Week two was all about texturing....


This bad boy is the Hypershade (and the Attribute Editor on the right). Look confusing and scary? THAT'S BECAUSE IT IS. And that is what you have to work with to create textures. Even the name Hypershade scares me.

But anyways. So after going through a couple of weeks of Hell trying to figure out how to do this stuff, we were thrown into an even deeper circle of Hell for the final week. Our last project (worth 45% of out entire grade for the class) was to completely texture and light a whole scene ourselves to look as close to the reference image as possible. There were about 4 different options to choose from. I chose a scary staircase.


So from left to right, that's Before, After, and Reference. I think it's alright, but I felt so rushed. If I had longer than a week to spend on that, I think I could have done a much better job. But part of being in this industry is having to deal with time constraints so I am trying to get used to that.

The rules were no Photoshopping allowed! That was 100% rendered in Maya, baby! Luckily, we didn't have to model anything or else none of that would have happened haha.

Overall, I did pretty great in this class. But it was really, really tough. It wasn't my best, but my final grade was a 95.7%. Boom.

Tuesday, March 12, 2013

My Model Creation Experience

First thing I want to say about MCR: I loved this class!!!!


The first project was a garage scene which we had to fill up with props. So in the above image, all of the lighter grey objects were created by me. Here is a close up:


The second project was a cafe scene, and for this one, I modeled everything except for the building and anything in it/on it.


That is a lot of stuff!!! I made some extra little props for the table that weren't part of the minimum requirements. (I did not make the creme puff thing on the plate though.) Here is a close up:


The third project was a quick one. We were just learning how to map out UVs on models. Basically UVs are just little maps on the surface of your models which tell your textures where to lay on the model. For some reason this is the modeler's job and not the texturer's so we had to learn that this month. It's nothing too special to show, but it can be tricky. It takes some critical thinking sometimes. But once you get a feel for it, it's easy stuff.


Lastly, we had to recreate an entire scene based off of a photograph! This project was SUPER fun for me. I loved modeling everything like all the little trinkets. Here is the reference photo that we had to use. (There were several options for this project, I just liked the look of this office.)


I am so going to try modeling my scene version of this after I master texturing! :) I am currently taking my Shading and lighting class. So by the end of the month I may be able to even better recreate this photo! I hope anyways. My grade for MCR? 97%! Yeah, baby!

End of Art 2


So I know it's been a long time since I posted on my blog. But I do want to catch up. So! Art 2...months ago. Above is a picture of my character creation! We had to do a front, back and side view (with proportion lines, which I turned off for this picture) as well as a demographic change. That's what the little powerpuff-looking girl is there. A demographic change is basically a version of your character which is more geared to a different audience than your current character. I chose to do a demo change for a younger audience. Underneath is my original concept for the character.


We also had to do an environmental concept to match the character. The point of this is because we ended up doing a whole storyboard with our environment and character. Above is my environment concept, which was deeply inspired by the Secret of Kells. Really good movie, phenomenal animation.

My rough storyboard:

My final storyboard:


So there you have it! The final product of my Art 2 experience! And my final grade was 98.94% Yay me! Overall, I enjoyed the class, though the storyboard was very challenging with the time constraints.

Wednesday, December 5, 2012

Art 2: The first two weeks


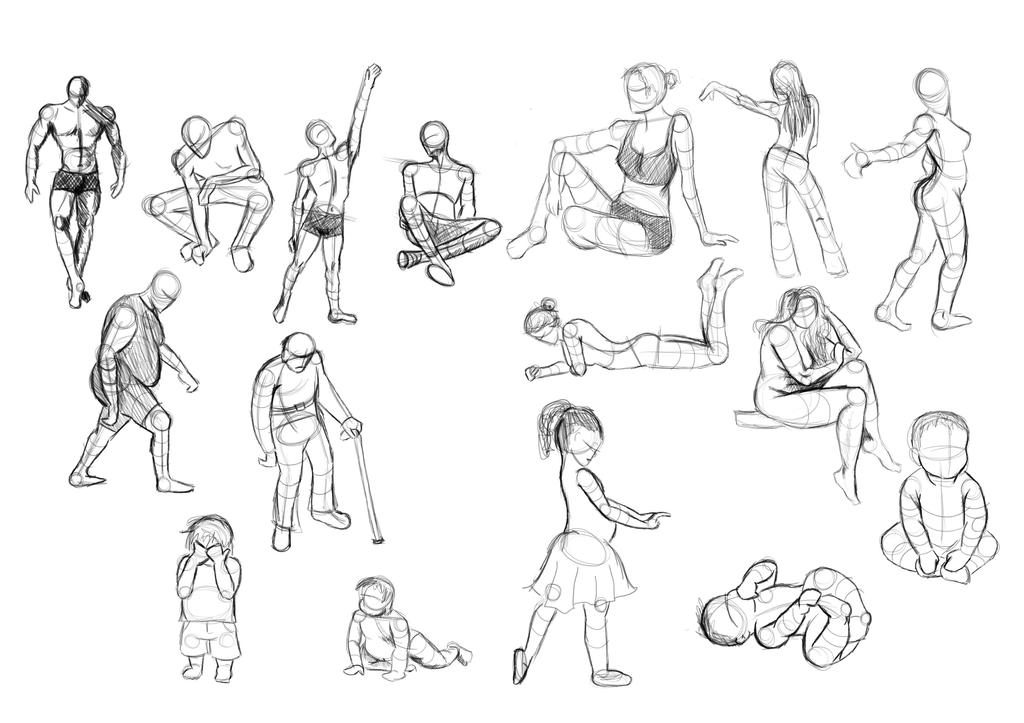
So this month, we started off with some figure drawing. Surprisingly, the majority of students in the class had never really worked with gesture drawing before, myself included! Above are some of my gestures from the first project's exercises. Here are some cat gestures that I did for another exercise:


But the real project was to deconstruct, repose, and reconstruct some characters based on our new knowledge of gesture work and the use of construction shapes. The shapes are extremely useful for posing because they help you to maintain the proportions and volumes of the different parts of the body. This is very important in making your character more dynamic and believable.

First we started off simple. It was a good place to start because it really gave me a feel for the use of construction shapes and how to pose. I didn't get it quite accurate yet, but it was a start.

Here are the others.


I spent a lot of time improving and refining the super hero woman, as my instructor advised, and here was the final result:


So that was that project. The way the projects are graded in Art 2 is sort of like a game to me. It's graded in tiers. There is the "base line" level, the "novice" level, the "proficient" level, and finally the "advanced" level. So the exercises and simple character re-pose were base-line for this project. Then the little guy I did was my novice level. The hero was proficient, and the sculpture was advanced. (I personally thought the superhero was harder but that's just me.) The thing is, you are only graded up to 70 points for base line, up to 79 for novice, 89 for proficient, and if you can finish the advanced level, you have a shot at getting your 100%.

Of course I will treat it as a game! A challenge! Well, I did it and I got a 99% baby!


....


Week 2's project was a nightmare for me! First of all, I didn't leave myself enough time to really work on it. I should have started early since it was a texture based project, and I am horrible at textures. But I guess I was too busy eating turkey and mashed potatoes or something.

The object this week was to analyze different animals and their anatomy and then mesh them together into a believable "creature."

I chose a black-necked stork, a squid and a green sea turtle. Firstly, we were instructed to do some studies on our chosen animals. Here are mine:


Next, we had to do some texture swatches to practice for our final drawings. Here are my tentacles and turtle flippers:


We also had to do some texture studies for our proposed creature's environment:


We also did a few different concept drawings for our creature, but I will just show you my final. So if you ever wanted to know what it would look like if a stork and a turtle made babies and it somehow mutated and merged with a squid then.....drum roll please...!


And there you have it! A Squea Torkle! And for this one I got a 97! Not bad, considering I was really floundering over this one. (Semi-pun was semi-intended...)

Now this week we are doing character creation. Want a sneak preview? Here are the character concepts I've got going on so far:


She's a wild druid woman, living amongst the trees and searching for someone very dear to her. I think I'm going to go with a final version most like the middle concept. I'm having a lot more fun with this project than the last! Can't wait to show off the end results! (I am so going to try modeling my character in Maya during winter break if I have a chance!)

Thursday, November 15, 2012

The Low Down on 3DF

So the week is coming to a close and 3D Foundations will be a thing of the past. I am sad. I really loved this class! At the same time, it was pretty stressful. But still, I learned so much and made many new friends.

So the busy month is the reason I haven't posted at all. But now that I'm done, I can sum up what happened.

Well, first of all, we started off with some rough story boarding.


We were able to chose from three actions and three props. (Jump, heavy lift, shooting a gun along with a fire hydrant, a chair, or a shotgun.) I obviously chose a heavy lifting action and my prop was the chair. We could choose any of the three props just so long as whatever prop we chose, it was visible somewhere in our final project.

Our next project was to model our prop. We had a specific structure to follow with given reference images and then we could add whatever details we wanted with our remaining poly count. The poly limit on the prop was 500. My final poly count was 492.


Not bad, eh?!

Then came the character...


Of the 800 poly count limit, I hit 740. I obviously opted for the female character reference. It seemed like the greater challenge.

Next, we textured our character's head just for experience. We weren't actually allowed to use textures for our final movie, but we did at least have to learn about the process of texturing, including UV mapping and texture painting.


This was my textured head, and if you want to know what the flat texture looked like before I slapped it on:


Next, we had to rig our character for animation. That means we add a sort of digital skeleton of bones and joints to the character and then attach them to the character's body parts, or the geometry (as everything you model is made up of bits of geometry).


The reallyyyy lengthy part was the animation. We had to animate 144 frames. Luckily, Maya does a lot of the in between work, but you still have to do all of the main poses. Then you go back and add in some more frame keys to make the motions look more natural.

Then we colored all of the objects and added in lights. Lastly, you render, which is a lengthy process in which the computer calculates all the different elements you put in your scene and translate it into tons of individual images (all of your frames). Finally you can put those images together into a movie and you haveeeee:


So there you have it. A whole month of ridiculous labor translated into 6 seconds of glory that only the creator can appreciate!

Aaaand...I GOT ANOTHER 100% =D

Monday, October 29, 2012

Art 1 Conclusion


Final grade for Art 1: 100%!!!!!

Yay! My first perfect score! And many more to come. I am so glad I decided to go to Full Sail online. I am totally in my element here. It leaves me with an unknown future, as there are no game companies around here, but I am going with the flow. Who knows, since I'm doing so awesome, maybe I'll make a totally hit indie game and rocket launch my career in the middle of my schooling and not have to go anywhere. It could happen. I won't prevent it, that's for sure.

To further my boasting, not only did I get a perfect score this month, but I also got the Course Director's Award for my class in Art 1! Not entirely sure what that means, but I am overly proud of it. I tried really hard in my art class, okay?!?!

Anyways, the above image is my final project in all of it's glory...Haha, just kidding...about the glory part. It is my final project, though. I like the way it turned out a lot! My least favorite one is the busy Times Square one. But oh well. It's good. I got a 100%. So it is good.

Okay, back to work for me! Got some 3D modeling to learn!

Friday, October 19, 2012

Decisions, Decisions...

So I am having a hard time deciding what to do for my final project in Art 1. It's a perspective project, so I need to create depth through either linear perspective or atmospheric perspective, or both.

Originally I wanted to do a sort of fun, whimsical cartoon-ish digital painting. It turned out something like this:


I mean, I like it, but I don't... I want to finish it...but I don't. I don't know. I just don't feel like it's great for this week's project. I like it, but not for class, I guess is what I mean.

So I decided to go more for realistic. I have started trying my hand at digital "speedpainting." It's not quite that speedy yet. Took me about 3 hours. But it looks pretty darn awesome, in my opinion.


Unfortunately for my sense of having a life, this is meant to be a part of a four-piece set. I have to go out with a bang, right?!

Monday, October 15, 2012

Latest Project


Here is my finished texture project. It is closely based off of a screen shot from Skyrim. I had fun doing the trees in the distance and the rocks as well. The bigger trees were more annoying though. There's just so many of them! But the goal here was to create the illusion of depth through texture. How did I do?!


Loki helped, I'll admit it.

Well, I just got some feedback from my instructor that I should try and push the details in the foreground to help the illusion of depth. Hmm...I bet he means in the water. Maybe I could add some floating leaves on the surface of the water. I had a lot of trouble getting the water to look...watery. I don't know if I could get the details any better there after all I've done to it. I'll see what I can do. I'm really short on time. 

In other news...I got a 100% on my last project, the silhouettes! Yay! Still got straight 100's in this class. Working hard.

Guess I better keep working on this drawing if I wanna keep it that way...


Tuesday, October 9, 2012

Week 3 Exercises


This week we are learning about textures, patterns and lighting. So of course we had to do a basic value drawing. There were five exercises this week, which took me by surprise because there has usually been three.


This exercise was way more fun than I thought it would be. No lines allowed here, it had to be all value surfaces. I'm pleased with how it turned out, except for maybe the top left area.


This one is pretty self explanatory. I think I did pretty good here. We had to do it first with an H pencil and then again with a B pencil. The H drawing did not turn out so well, I just don't do well with H pencils. I don't like them.


Here is the H. It's a lighter pencil obviously but it's too hard to shade.


This one was fun! We had to pick from a list of adjectives and then a list of nouns and draw it. I picked "rusty" and "toilet." I guess you could say I've had some influence from Silent Hill in my day.

All in all, I'm impressed with myself for getting all of this done in one day. I was determined, especially after I accidentally had to hand in my work late last week. I am definitely going to hand my work in extra early this week. 

Oh! And there was one more exercise. We had to take pictures of five eggs in different lighting to create different moods. Here they are.